Faq : How to use the light
May 14, 2010
filed in Weddings
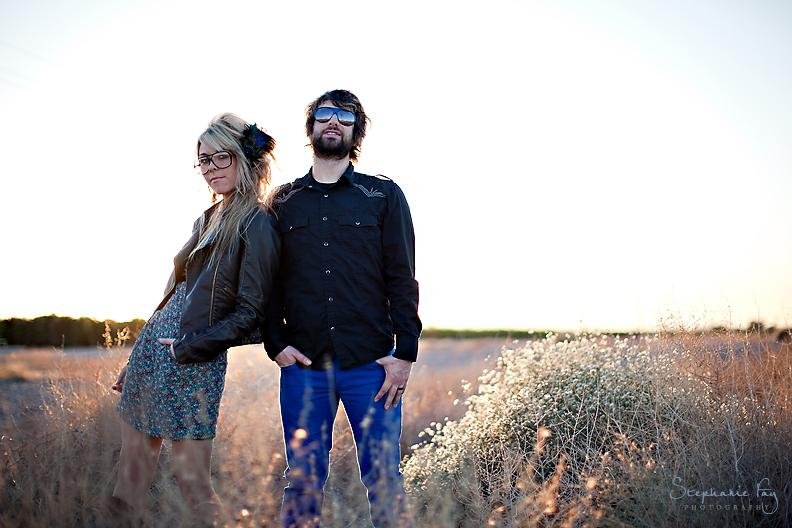
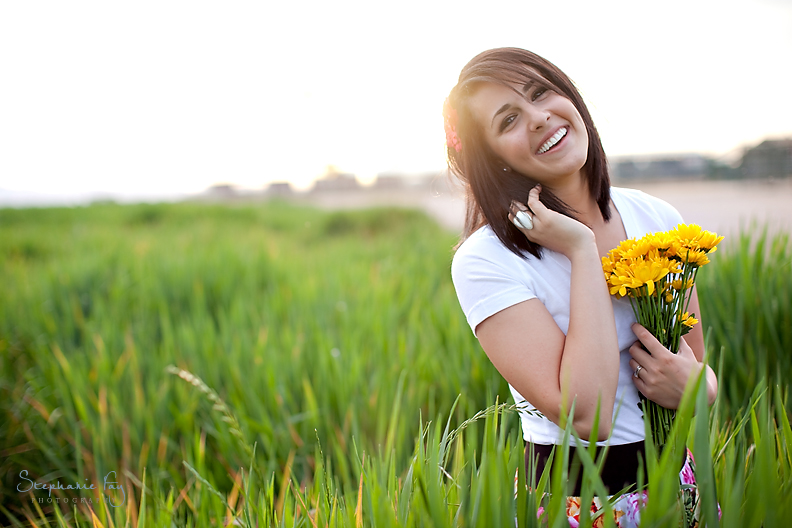
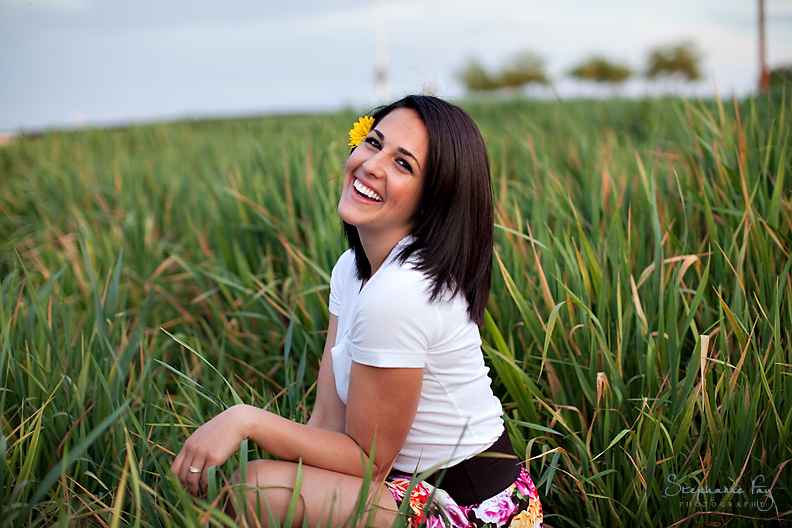
The most common question I receive is about lighting. Before I start this post, I do want everyone to know that how I shoot isn't how everyone else shoots and I don't believe there is a right or wrong way to shoot. These are solely my suggestions on how I shoot with light. My goal for this post is to explain how I shoot and manage light in the simplest terms for you to understand. Shooting into the light can definitely be tricky and practicing is the sole way to learn. Below I have a series of photos I'll be individually writing about to explain how I achieved the look I wanted for each photo in the various lighting situations. I will also explain the camera settings used when I shot the photo. I am continually learning how to shoot with light so here is the little I can share...
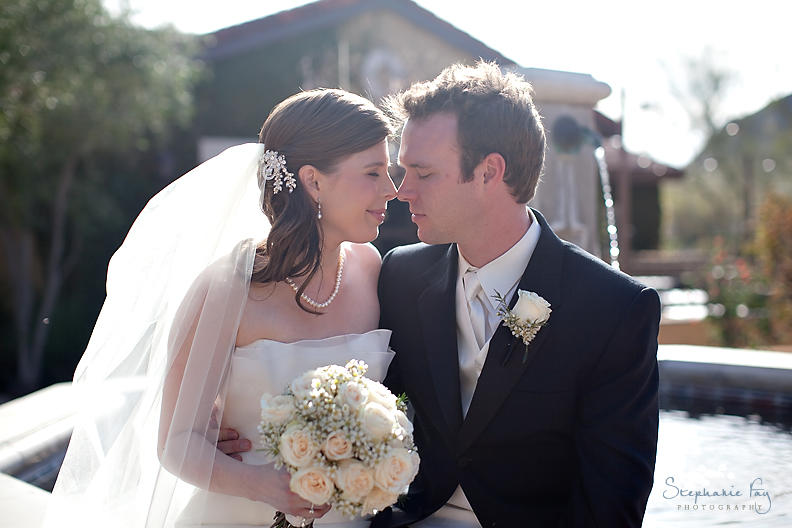
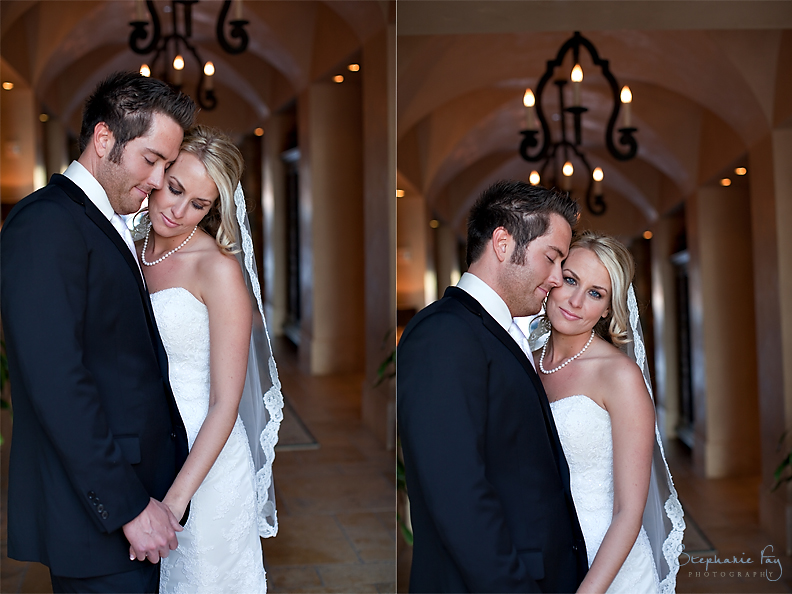
The first photo below is of Daris and Jason. (Married at Sassi Venue in Scottsdale Oftentimes when bride and grooms opt to make the decision to have a first look before the ceremony, the light is often harsh due to the first look being before the ceremony and setting sun. I shot this photo around 2:30pm where the sun was still quite bright. I really feel that we should all stop running away from the sun into the shade and embrace the bright sun because we can achieve beautiful glowing photos. I love this photo because it looks so dreamy and I love how the sun really lit up her veil and created a soft haze over them. Don't be afraid to shoot into the sun! The sun is behind them and a bit overhead.
This shot was taken at ISO: 125- 50mm -f.2.2 1/2000 sec. When the sun is higher in the sky, the photo isn't always blown out in the background. I raised my Fstop so they were sharper and I wanted the background to be seen more. I often get the question DO YOU HAVE A FAVORITE LENS? The 50mm 1.2. For those of you that are just beginning, don't panic, I'll speak in very simple terms. The 1.2 lens creates a very fuzzy background and if not careful, your f-stop can be too low and the subjects can often be shot out of focus. When you raise your f-stop, it lessens the fuzziness (often called bokeh) in the background and your subjects are more in focus. You can read more about this HERE.
Please know that I'm not a camera techie. I have learned on my own by shooting and reading my manual so please don't read this as a manual, but simply how I go about shooting into the light.
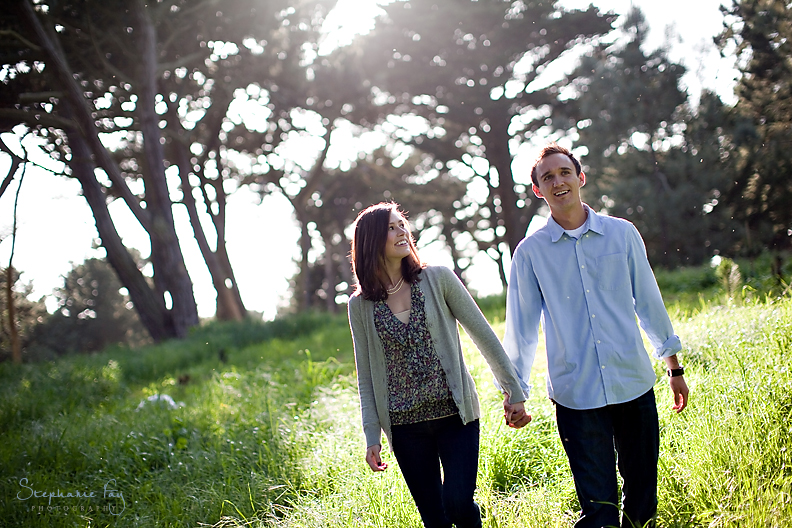
This photo is of Ashley and Kevin in the San Francisco golden gate park. We took this photo around 4:30pm. The sun was still a bit bright, but I loved how it gave my subjects a glow about them. I suggest not shooting DIRECTLY into the sun but positioning yourself around the couple until the sun isn't glaring into your lens. In this photo I used the tree branches as a natural diffuser for the sun. This prevented the picture from having what some call excessive glare and allowed me to get the couple in focus while retaining the natural glowing effect of the sun.
ISO: 100 - 50mm 1.2- F-1.8. 1/1600 sec. I always keep my ISO low when the sun is bright and I raised my f-stop because my subjects were moving. I wanted to make sure they were both evenly in focus.
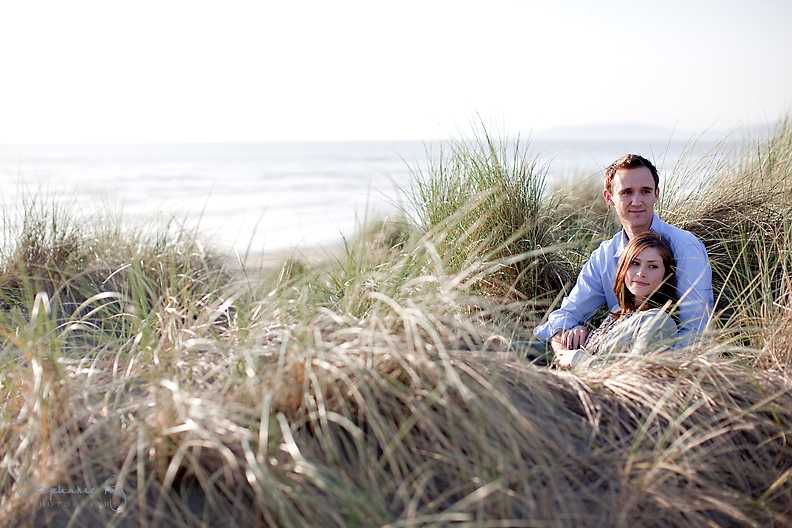
Shooting WITH the light can be tricky as well. At noon or 1:00pm the sun would be WAY too harsh, but because the sun was softening (around 5:30pm) I was able to use the sun and the shadows that laid on Ashley and Kevin. The sun is to the left of them and I felt it looked perfect for this shot.
ISO: 100 (again a low ISO) The more you raise your ISO the brighter (light sensitive) your photos will be. 50mm 1.2- Fstop 2.2 -1/1600sec. I raised my fstop to 2.2 because I wanted more of the background in focus. I wanted to see the ocean more and not have the background excessively blown out. With editing, you can also achieve more of the ocean in the background, but I prefer to edit less and work more within my camera body. Using the recovery tab when you edit your photos can lessen some of the harshness caused by shooting into and or with the sun.
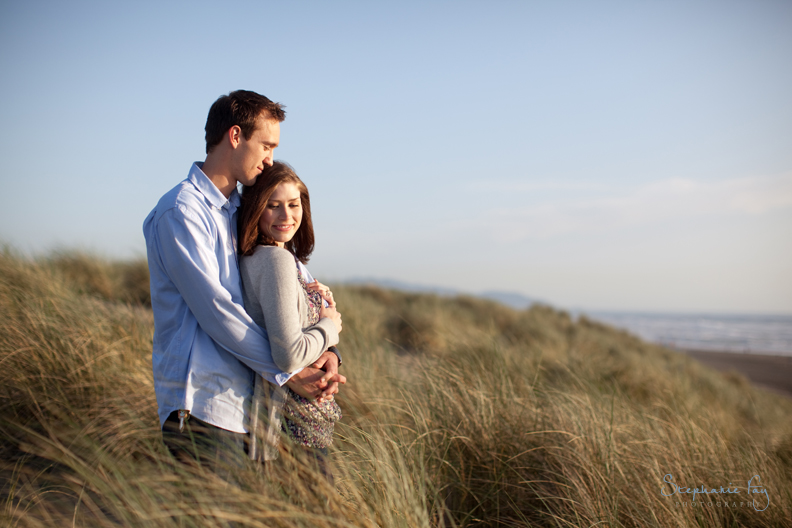
The sun is actually completely in front of them in this photo. I knew they would be bright which required me to change my camera settings to achieve this soft look with the blue sky. This photo isn't actually sharpened because I loved how soft it looked.
I adjust my settings in camera until it looks the way I want it to look... I don't have specific settings I live by. I go by what it looks like on my camera LCD screen. And believe it or not, I have never had an issue with it uploading any different. What I see on my camera LCD is generally what I get once uploaded.
ISO: 100 50mm 1.2- Fstop 2.0 1/4000sec. I think it's good to shoot WITH the light AND into the light to understand how different they look. Once again, don't be afraid to use the sun!
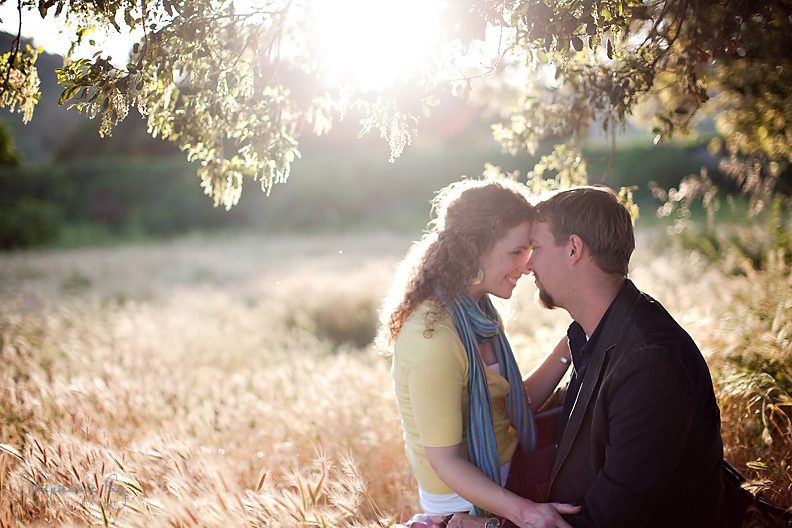
This is an example of using the sun in what I feel is the wrong way. I still love this photo, but using something like a tree can help shade your lens when shooting directly into the light. When shooting DIRECTLY into the light, I almost everytime get a haze, my couple won't be tact sharp or I get a glare. It's extremely hard to get your subjects completely in focus while shooting into the sun when it's a bit too bright.
ISO : 100- 50mm 1.2- fstop 1.6 1/1000 sec
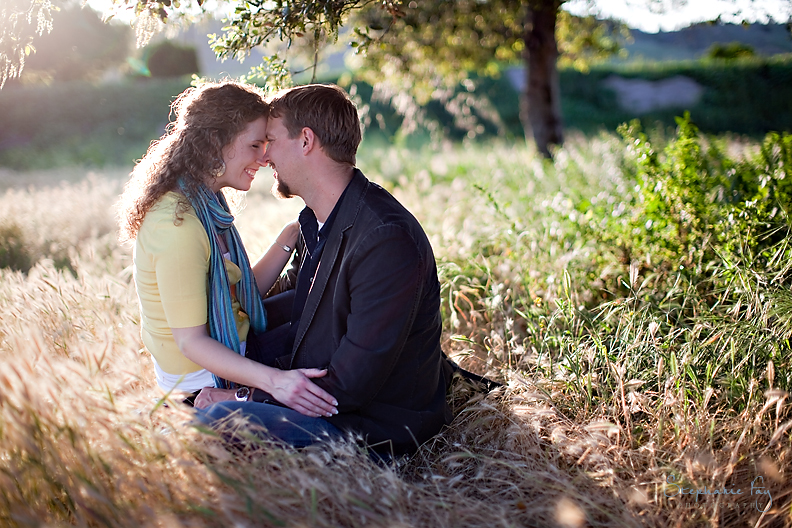
The photo below is the same photo but I simply moved over for a better angle. Here is the correct example. After seeing that I had excessive glare and trouble focusing on my subjects, I took a step over and shot a bit to the side instead of directly in front. I also could have stood up straighter, shot down on them and used the tree to block the sun a bit. I still had the sun coming through the tree which helped illuminate the couple.
ISO : 100- 50mm 1.2- fstop 1.6 1/1000 sec. I kept the fstop a bit lower because neither Carrie or Scott were in front of or behind each other. It made it easy to have them both in focus and have the background exactly how I wanted it. By simply changing your angle, the entire look of the photograph can change.
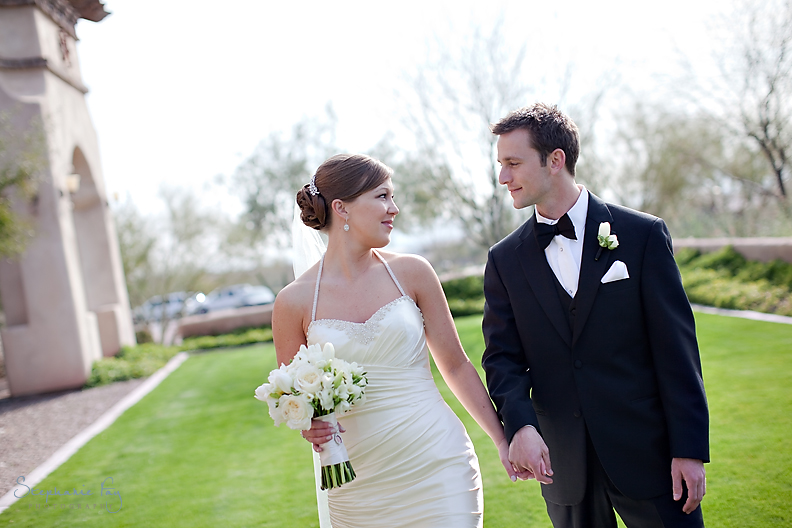
Lauren and Garrett also chose a first look at their wedding. The light was harsh before the ceremony, but I LOVED how it made them glow. It was a bit of a hazy day (here in Scottsdale we don't have those often) so I was able to use the tiny bit of cloud cover as a natural filter to soften the photographs. The sun is a bit to the right of the couple and behind them here.
ISO: 125 -50mm 1.2- Fstop- 2.2 -1/1250sec. I shot with a higher F-stop in this photo because I wanted more of the background in focus, wanted to darken the harshness of the sun, and also wanted them both to be in focus due to them walking toward me. I also speed up my camera's shutter to prevent Lauren and Garrett from being blown out in the photo. I should also mention that the faster the shutter speed in your camera settings, the darker the photo will be because less light is allowed to filter through the lens. A faster shutter also aids in getting your subjects in focus (this is especially important when they are moving). If your shutter speed is too slow and the subjects are moving, there is a much higher chance of having photos out of focus.
It was a cloudy hazy day for this photograph and we were surrounded by tall trees. I had to be careful because it was beginning to get dark quickly so I had to raise my ISO to 2,000 (even though it makes things more pixelated I liked the look in this specific series) - 50 mm 1.2- Fstop 1.8 -1/100sec (I had to slow down my shutter to allow more light in. I also raised my ISO so that my the photo would be more light sensitive, thus brightening up the overall affect of the photo) I raised my f-stop a bit because I notice that when the light gets darker, and your settings are not correct the photo can oftentimes be out of focus when the shutter speed is slow. I wanted it tact sharp so I balanced the ISO higher and raised the fstop to make sure they balanced each other out. I also warmed up this photo in Lightroom of Christy because often as the sun drops the lighting becomes "cooler" without the sun.
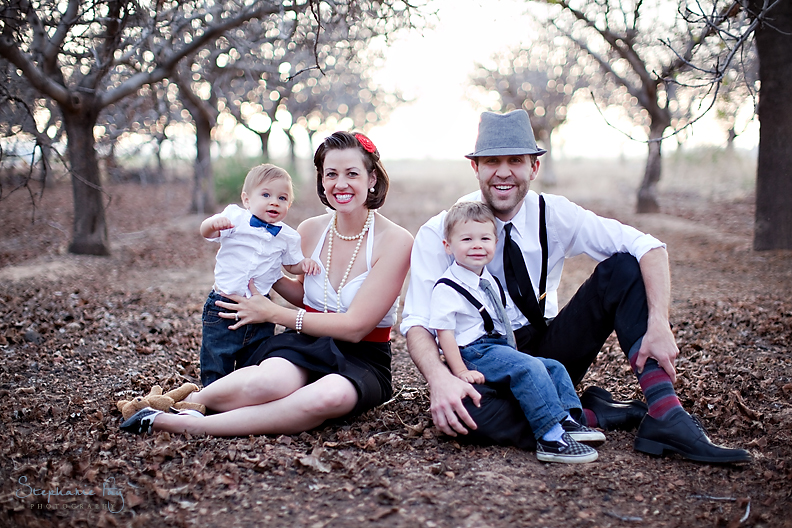
Below is what it looked like with some more light (when it was earlier in the shoot). The sun was still behind the clouds but they were thin so we had a bit of a glow. The sun is behind them to create the look of the golden trees in the background and I shot this at ISO 160- 50mm 1.2- 1/320sec I may surprise you that I shot a family portrait at 1.2 (which I RARELY do), but because I had them nearly horizontal to each other in a straight line, the 1.2 worked well for this photo. I also needed as much light as I could get in these trees so I opened my lens down to 1.2. It is always trickier to nail a shot when you are shooting wide open (fstop 1.2 in this case), but it's completely possible and can give your photos an incredible look.
The last thing I want to talk about is indoor lighting. I am NOT a huge fan of external flash, so oftentimes when I'm inside I find the nearest window or door and open it. I want the most light to flow in so I can still have a natural lit photo with a gorgeous inside background.
ISO : 400 -50mm 1.2-f 2.5 - 1/60 sec. My ISO is higher because they are inside (slight bit darker inside in this instance) and my fstop is higher because I want them in focus with greater background visual. Tarah and Joshua (married at Ashley and Kevin) opted to wait until after the ceremony to see each other and the light was still a bit bright when we began the session so taking them inside was a good option.
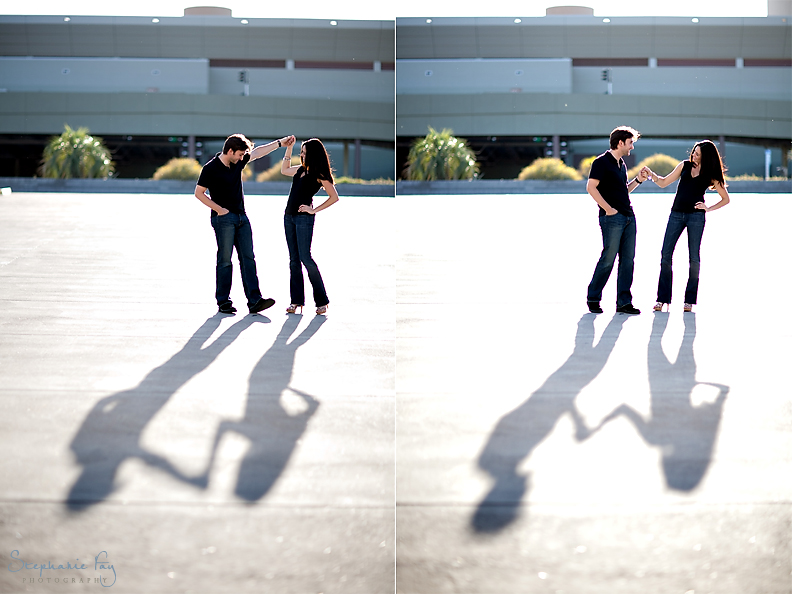
This is one of my favorite photos from Katie and Zack's engagement session because I just LOVE the light. This was taken during the first 30 minutes of their engagement session so the light was still very bright. When I walked into the parking garage I just LOVED how the light hit the concrete. I stood underneath the top layer of the parking garage and used the wall to block the sun. You cannot see the wall because I used it to block the sun. This way, I have no glare in my lens and I can absorb the saturation of the light and color without having the haze by the light. Using things to block the sun is REALLY great when wanting to use the light. This was probably taken around 5 :00pm and the sun sets around 7:00pm.
This was shot with the 80mm 1.2- ISO- 100- fstop-1.4 1/6000sec.
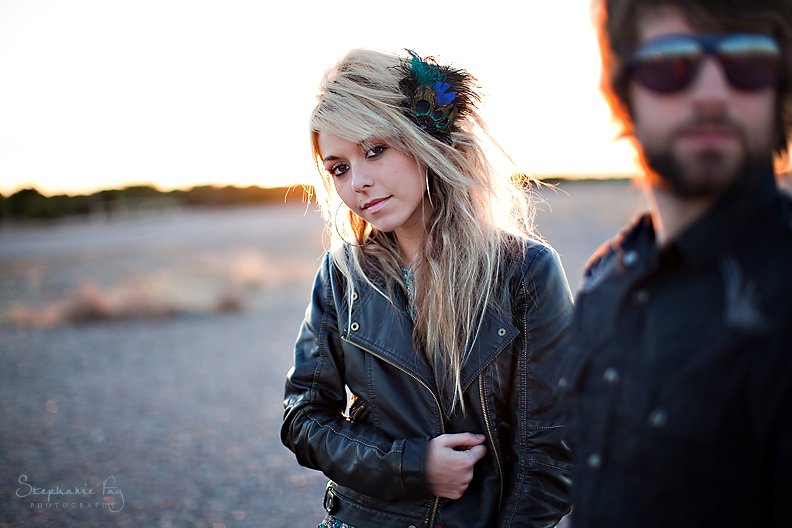
Promise and Bryan's shoot was taken in a regular dirt field but with awesome light. We probably had about 20 minutes left of sunlight and it was PERFECT behind them. However, if I were to still shoot directly into the light I would still get a big flare. Blocking the sun with your subject works to your advantage and helps your subject light up correctly. I just love the natural rim lighting produces around Promise in this shot.
ISO : 100- 50mm 1.2- Fstop- 1.2 1/800 sec. My fstop is low because I wanted Bryan completely out of focus. I like to place my focal point in my camera on the subjects eye so they are in focus. Without having sharpened my photo, the eye closest to the camera is a hair out of focus because I focused on her left eye. Be careful how low your fstop is when focusing on the subjects eye. You want to make sure their entire face is in focus so raising your f-stop will help the entire face to be tact sharp.
This is a great example of using the subjects to block the sun and still have what I call the glow effect.
Same settings of the above photo applied here as well. They are completely even with each other so 1.2 fstop worked perfectly.
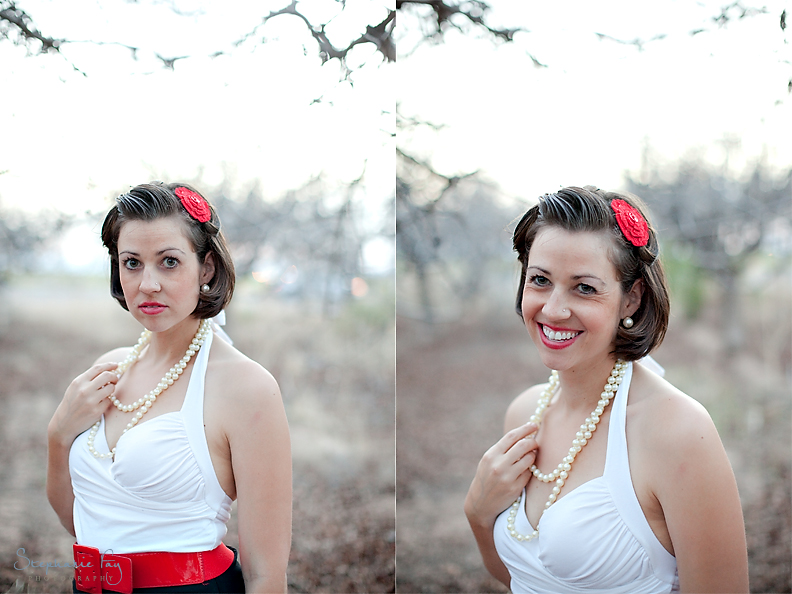
The sun was about to set in about 10 minutes so the sun was soft enough to shoot into the light. I had Jordan tilt her head a bit to cover just a little bit of the sun. I LOVE shooting into the light, but shooting with the light in this circumstance is still gorgeous as well. Take a look at the photo below...
ISO: 160-50mm 1.2- fstop- 2.0 - 1/250sec
The sun was just about gone so I had Jordan switch positions from me and I now was shooting away from the light. This is ALWAYS a good thing to do when the sun is just about gone because its SUPER soft and the subjects always have a nice golden glow about them. It oftentimes produces the some of the clearest skin tones around without any intensive editing. Check it out.
ISO : 160 -50mm 1.2 Fstop-2.0- 1/250 sec


May 14, 2010
filed in Weddings
T
he most common question I receive is about lighting. Before I start this post, I do want everyone to know that how I shoot isn't how everyone else shoots and I don't believe there is a right or wrong way to shoot. These are solely my suggestions on how I shoot with light. My goal for this post is to explain how I shoot and manage light in the simplest terms for you to understand. Shooting into the light can definitely be tricky and practicing is the sole way to learn. Below I have a series of photos I'll be individually writing about to explain how I achieved the look I wanted for each photo in the various lighting situations. I will also explain the camera settings used when I shot the photo. I am continually learning how to shoot with light so here is the little I can share... The first photo below is of Daris and Jason. (Married at Sassi Venue in Scottsdale Oftentimes when bride and grooms opt to make the decision to have a first look before the ceremony, the light is often harsh due to the first look being before the ceremony and setting sun. I shot this photo around 2:30pm where the sun was still quite bright. I really feel that we should all stop running away from the sun into the shade and embrace the bright sun because we can achieve beautiful glowing photos. I love this photo because it looks so dreamy and I love how the sun really lit up her veil and created a soft haze over them. Don't be afraid to shoot into the sun! The sun is behind them and a bit overhead.
This shot was taken at ISO: 125- 50mm -f.2.2 1/2000 sec. When the sun is higher in the sky, the photo isn't always blown out in the background. I raised my Fstop so they were sharper and I wanted the background to be seen more. I often get the question DO YOU HAVE A FAVORITE LENS? The 50mm 1.2. For those of you that are just beginning, don't panic, I'll speak in very simple terms. The 1.2 lens creates a very fuzzy background and if not careful, your f-stop can be too low and the subjects can often be shot out of focus. When you raise your f-stop, it lessens the fuzziness (often called bokeh) in the background and your subjects are more in focus. You can read more about this HERE.
Please know that I'm not a camera techie. I have learned on my own by shooting and reading my manual so please don't read this as a manual, but simply how I go about shooting into the light.
ISO: 100 - 50mm 1.2- F-1.8. 1/1600 sec. I always keep my ISO low when the sun is bright and I raised my f-stop because my subjects were moving. I wanted to make sure they were both evenly in focus.
ISO: 100 (again a low ISO) The more you raise your ISO the brighter (light sensitive) your photos will be. 50mm 1.2- Fstop 2.2 -1/1600sec. I raised my fstop to 2.2 because I wanted more of the background in focus. I wanted to see the ocean more and not have the background excessively blown out. With editing, you can also achieve more of the ocean in the background, but I prefer to edit less and work more within my camera body. Using the recovery tab when you edit your photos can lessen some of the harshness caused by shooting into and or with the sun.
I adjust my settings in camera until it looks the way I want it to look... I don't have specific settings I live by. I go by what it looks like on my camera LCD screen. And believe it or not, I have never had an issue with it uploading any different. What I see on my camera LCD is generally what I get once uploaded.
ISO: 100 50mm 1.2- Fstop 2.0 1/4000sec. I think it's good to shoot WITH the light AND into the light to understand how different they look. Once again, don't be afraid to use the sun!
ISO : 100- 50mm 1.2- fstop 1.6 1/1000 sec
ISO : 100- 50mm 1.2- fstop 1.6 1/1000 sec. I kept the fstop a bit lower because neither Carrie or Scott were in front of or behind each other. It made it easy to have them both in focus and have the background exactly how I wanted it. By simply changing your angle, the entire look of the photograph can change.
ISO: 125 -50mm 1.2- Fstop- 2.2 -1/1250sec. I shot with a higher F-stop in this photo because I wanted more of the background in focus, wanted to darken the harshness of the sun, and also wanted them both to be in focus due to them walking toward me. I also speed up my camera's shutter to prevent Lauren and Garrett from being blown out in the photo. I should also mention that the faster the shutter speed in your camera settings, the darker the photo will be because less light is allowed to filter through the lens. A faster shutter also aids in getting your subjects in focus (this is especially important when they are moving). If your shutter speed is too slow and the subjects are moving, there is a much higher chance of having photos out of focus.
ISO : 400 -50mm 1.2-f 2.5 - 1/60 sec. My ISO is higher because they are inside (slight bit darker inside in this instance) and my fstop is higher because I want them in focus with greater background visual. Tarah and Joshua (married at Ashley and Kevin) opted to wait until after the ceremony to see each other and the light was still a bit bright when we began the session so taking them inside was a good option.
This was shot with the 80mm 1.2- ISO- 100- fstop-1.4 1/6000sec.
ISO : 100- 50mm 1.2- Fstop- 1.2 1/800 sec. My fstop is low because I wanted Bryan completely out of focus. I like to place my focal point in my camera on the subjects eye so they are in focus. Without having sharpened my photo, the eye closest to the camera is a hair out of focus because I focused on her left eye. Be careful how low your fstop is when focusing on the subjects eye. You want to make sure their entire face is in focus so raising your f-stop will help the entire face to be tact sharp.
Same settings of the above photo applied here as well. They are completely even with each other so 1.2 fstop worked perfectly.
ISO: 160-50mm 1.2- fstop- 2.0 - 1/250sec
ISO : 160 -50mm 1.2 Fstop-2.0- 1/250 sec

